
Rolling upgrades
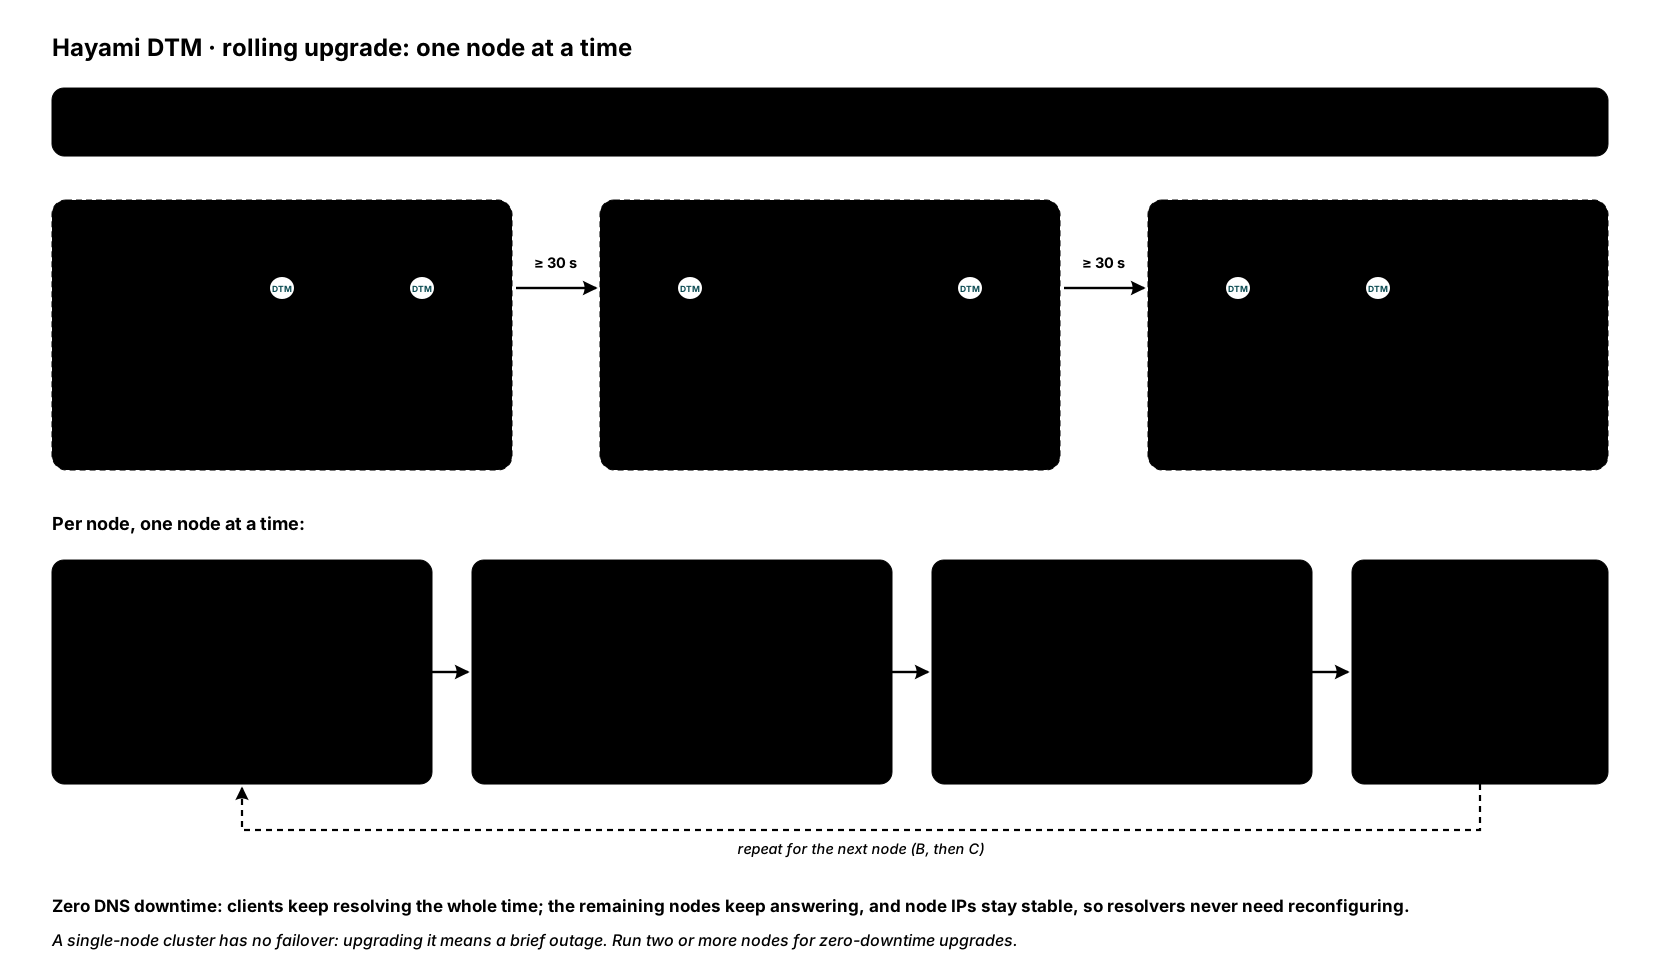
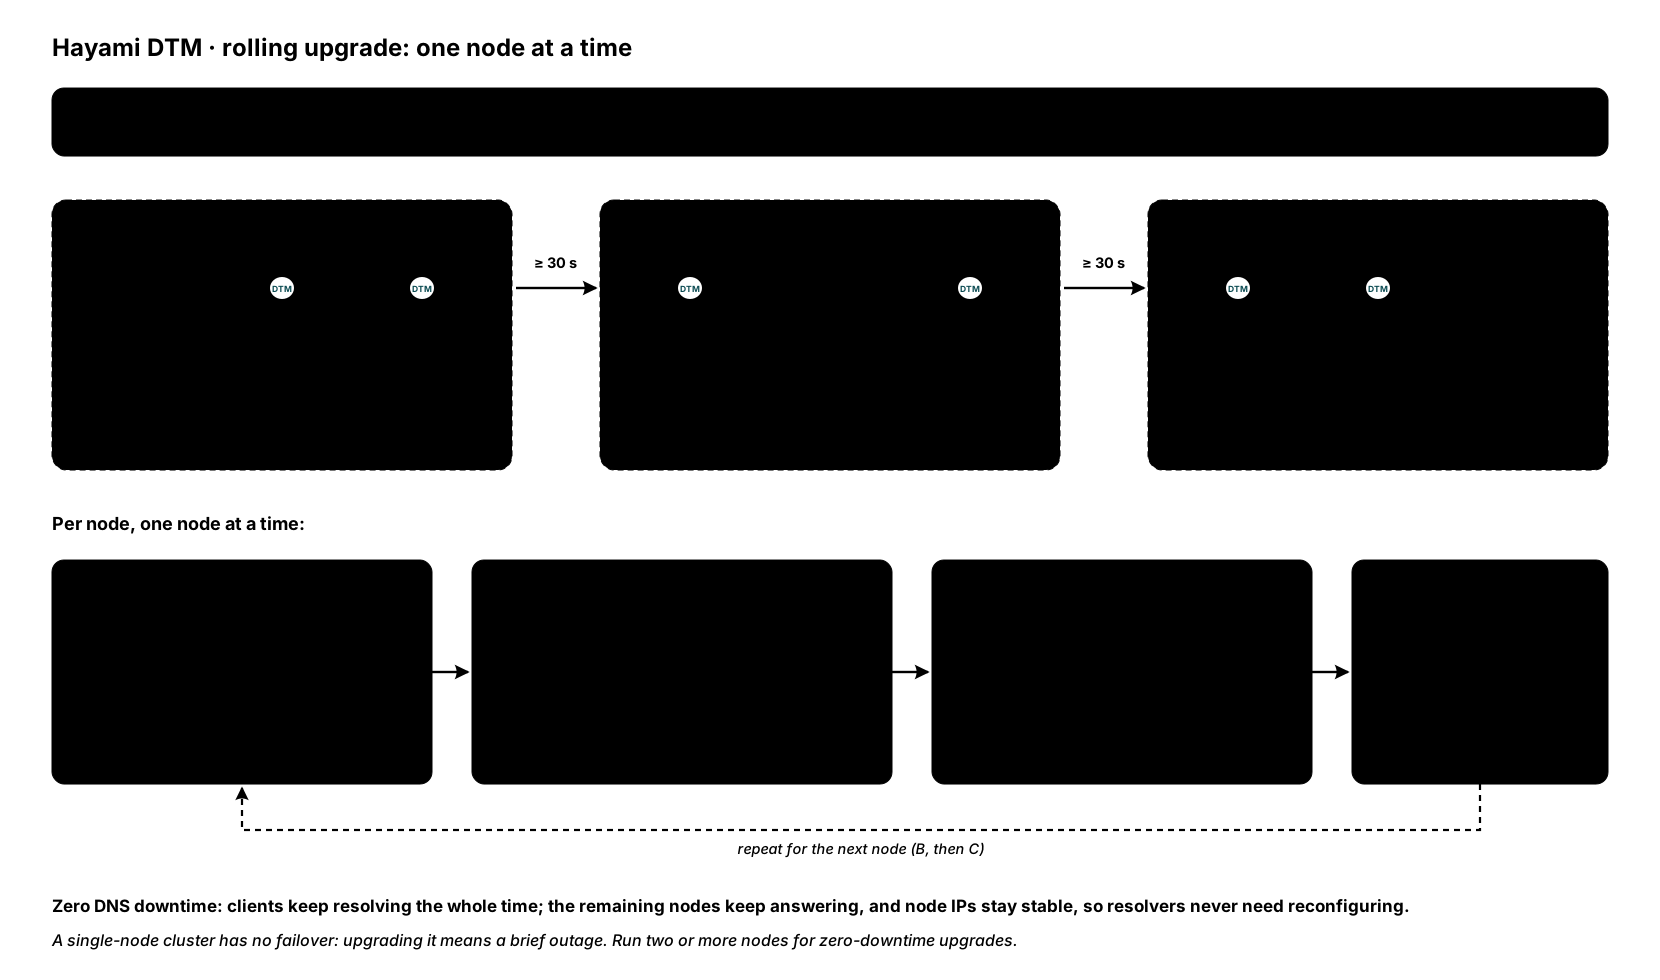
DTM ships as Azure Marketplace VM image versions. Upgrading a node means replacing its VM with one built from the new image version while keeping the node’s private IP, one node at a time. DNS stays available throughout because the other nodes keep answering, and each node drains gracefully before it stops. Nothing is downloaded onto a running node, no node needs outbound internet access, and routine upgrades never need a shell: everything runs from the Azure control plane and the DTM admin UI or API.
Before you start
Section titled “Before you start”- Confirm the cluster is healthy: every node shows
aliveon the UI Nodes page or inGET /api/v1/nodes. - Confirm DNS is answering, from any client machine:
dig @<node-ip> <a-known-name> +short. - Confirm replication is current: zone
versionvalues match across nodes. - Note the version each node is running (the UI Lifecycle page lists them, with an update banner when a newer image version is available) so you can roll back.
Choose your path
Section titled “Choose your path”The mechanism depends on how the cluster was deployed. Both replace the VM and keep its IP; they differ in who owns the deployment’s desired state.
| Deployed with | Upgrade with | How it works |
|---|---|---|
| ARM template, Bicep, or the Marketplace wizard | Stable-IP swap (Path A) | The Lifecycle page generates a pre-filled deployment plan for a replacement node on the new version, which you run under your own Azure credentials; DTM syncs it, moves the old node’s stable private IP to it, and deletes the old VM. |
| Terraform | Targeted apply per node (Path B) | Terraform replaces that node’s VM against the same network interface and the same data disk, so the IP and the data are retained by construction. You gate on readiness between nodes. |
Whichever path you use, draining is automatic: stopping or replacing the VM
signals the service, readiness flips to 503 so a load balancer polling
/readyz evicts the node during the drain grace window, in-flight connections
drain, the node leaves the cluster cleanly, and the database closes safely.
Path A: stable-IP swap (per node)
Section titled “Path A: stable-IP swap (per node)”- Open the Lifecycle page. It shows each node’s version and flags the nodes that have a newer image version available.
- Start the swap with
POST /api/v1/lifecycle/swap(admin), givingtarget_node_id,target_version,stable_ipandspare_ip(add"accept_outage": trueonly if you accept a single-node window). The Lifecycle page tracks the run and offers Retry and Abort; it does not start one. DTM first checks its gates: enoughalivenodes for a no-outage swap (at least two, counting the node being replaced, overridable withaccept_outage) and no other swap in progress; the replacement is admitted only once it joins the cluster and reportsalive. - Deploy the replacement VM using the plan the page generates: a runnable
az deployment group createof the cluster-served add-node template, with the target image version and the seed IPs (the current alive nodes) already filled in. The remaining placeholders carry one-line guidance, and the free IP you choose for the replacement is the same value you give the swap as its spare. The deployment runs under your Azure credentials; DTM’s own identity is never used to deploy the replacement VM. - DTM syncs the replacement, drains the old node, then moves the node’s stable private IP to the replacement, so client DNS settings never change. Once the IP move succeeds, the swap’s final cleanup step deletes the old VM (and its network interface and OS disk) automatically. The old node’s data disk is left in place as a rollback artefact; delete it once you have verified the upgrade.
- Verify, wait for convergence, and repeat for the next node.

What a swapped node does not carry across
Section titled “What a swapped node does not carry across”The replacement is a fresh node: an empty data disk and a new node identity. Zones, records, health checks, users and the default forwarder set arrive by replication before the IP moves, so DNS answers are unchanged.
Node-local settings are not replicated and come up as the deployment’s
defaults on the replacement: rate limits, AXFR and dynamic-DNS policy, cache
size, forwarder hardening, OTLP export, Entra SSO configuration, the
region-discovery backend and transport settings. Re-apply them for the new
node after the swap, through the UI, the API (/api/v1/config/*), or the
Terraform provider’s per-node resources.
Files on the node are not carried across either. The replacement boots
from the new image with a fresh operating-system disk, so anything installed
by hand on the old node is gone: a per-node UI certificate (the replacement
mints a new self-signed pair), an API certificate placed under
/etc/dtm/api-tls, or any other break-glass change. Re-install them on the
replacement, following TLS certificates.
Path B: targeted Terraform apply (per node)
Section titled “Path B: targeted Terraform apply (per node)”Terraform-deployed clusters ship two nodes as separate module instances fed
from a single image variable, so a plain terraform apply after bumping the
image replaces both nodes at once. Target each node explicitly.
-
Set the image version variable to the new version. Pin the exact version rather than
latest, so every node lands on the same one. -
Apply to one node and wait for it to be ready before touching the next:
Terminal window terraform apply -target=module.dtm_node1# gate on readiness over the network, not on the VM being "running"until [ "$(curl -sk -o /dev/null -w '%{http_code}' --max-time 3 https://<node1-ip>:8443/readyz)" = "200" ]; do sleep 5; done -
Repeat for the next node, then run a final untargeted
terraform apply. Expect no changes; if it wants to change a node, stop and read the plan.
The plan for an image change shows the VM being replaced, with the network interface, the data disk and its attachment untouched. The node keeps its IP, its data, its identity and its node-local settings, so nothing in DTM needs re-applying afterwards.
The operating-system disk is new, though. Configuration is re-rendered from
your Terraform module, and the UI certificate is re-fetched from Key Vault,
so those survive; anything placed on the node by hand outside the module (an
API certificate under /etc/dtm/api-tls, a break-glass edit) does not.
Re-install it on the replaced node, following
TLS certificates.
Verify after each node
Section titled “Verify after each node”All of this is done over the network; none of it needs a shell:
# 200 = ready to serve (startup can take a few seconds up to about a# minute on nodes with many health checks; a replacement node's first# boot can add several minutes while its Key Vault access propagates)curl -sk https://<node-ip>:8443/readyz- The UI Nodes or Lifecycle page (or
GET /api/v1/nodes) shows the nodealiveand reporting the new version. dig @<node-ip> <a-known-name> +shortanswers, from any client machine.- Zone
versionvalues match the other nodes.
Then wait at least 30 seconds for the cluster to fully converge before starting the next node.
Mixed-version window
Section titled “Mixed-version window”While old and new versions coexist mid-roll, hold off on configuring features
introduced by the target version. An older node does not understand a new
record field and can strip it as changes replicate; the record degrades to its
safe fallback (for example, a weighted policy serves as round-robin), never
to an outage, and heals once every node runs the new version. Finish the roll,
then adopt the new capability.
OS patching
Section titled “OS patching”Operating-system patching (for Azure VMs, via Azure Update Manager) is separate from DTM image upgrades. Its reboots are absorbed by the same drain-and-rejoin path, so a patched node leaves, reboots, and rejoins the cluster the same way an upgraded one does.
Rollback
Section titled “Rollback”Roll back with the same path you upgraded with, using the previous image version, one node at a time. Released images keep the database format compatible, so your DNS data needs no restore.
- Path A: a second swap per node with
target_versionset to the previous version. It needs a spare IP again and the previous version still listed in the offer. - Path B: set the image variable back and apply per node with the readiness gate, exactly as the forward roll. Never roll back with an untargeted apply.
If something goes wrong
Section titled “If something goes wrong”- A node that does not come back ready: check its logs through the Azure serial console or boot diagnostics, or roll it back on the previous image version with the same path. See troubleshooting.
- A node that rejoins but looks out of date: wait one convergence cycle; if it is still behind, make a no-op change (for example re-save a zone) on a healthy node to trigger a re-broadcast.
- Multiple nodes down at once usually means the process moved too fast: bring a node back to restore availability, then slow down.
- Never redeploy a node under its existing name with a fresh data disk. A node’s identity is tied to its name; a node that comes back with the same name but a new data disk is refused by its peers and cannot serve the API cluster-wide until it is removed and re-added (see removing nodes). The two paths above avoid this by design: the swap deploys under a new name, and Terraform keeps the disk.